通过PHPStudy集成环境 中的OpenSSL工具生成公钥及私钥
1、运行 cmd
2、进入 OpenSSL工具目录,PHPStudy集成环境 中的OpenSSL工具在Apache目录中的bin文件夹中;例如 OpenSSL工具在H:\phpStudy\Apache\bin
C:\Users\Administrator>H:

H:\> cd phpStudy\Apache\bin

H:\phpStudy\Apache\bin>
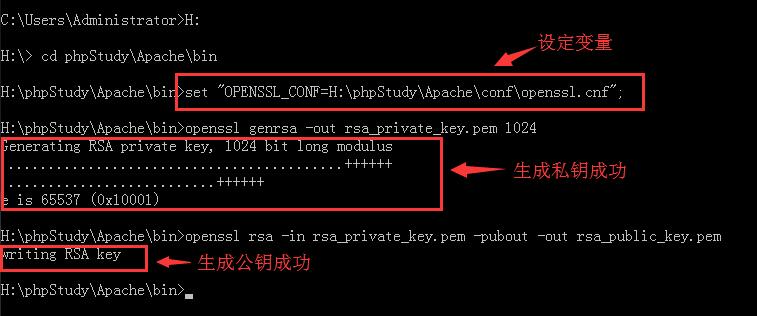
3、设置变量值, PHPStudy集成环境 中的Apache目录下conf文件夹中有openssl.cnf文件,该文件为设定OpenSSL工具的默认值,设置“OPENSSL_CONF=H:\phpStudy\Apache\conf\openssl.cnf”
H:\phpStudy\Apache\bin>set "OPENSSL_CONF=H:\phpStudy\Apache\conf\openssl.cnf";
4、通过OpenSSL工具生成私钥
H:\phpStudy\Apache\bin>openssl genrsa -out rsa_private_key.pem 1024该命令会生成1024位的私钥
5、根据生成的私钥生成公钥
H:\phpStudy\Apache\bin>openssl rsa -in rsa_private_key.pem -pubout -out rsa_public_key.pem生成成功的界面如下:


 贵公网安备:52010302001392号